Using SVN Versioning on a local Computer.
Previous Top Next

Steps to initialise an SVN repository on the Local Computer :

  1. Download TortoiseSVN from http://tortoisesvn.net. Make sure you select the "command line client tools"!

  2. Download WinMerge from http://winmerge.org/downloads and install WinMerge with these options checked:


  3. Create a New Repository:
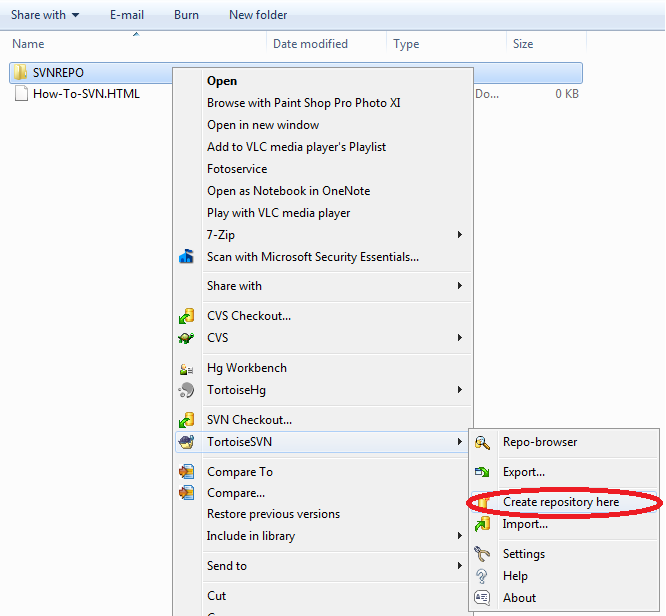
    1. >Create a new folder to contain the SVN repository where all source versions are stored.  If you are versioning several projects, you might wish to create a separate folder for each.
    2. RightClick on the folders and select TortoiseSVN / Create repository here
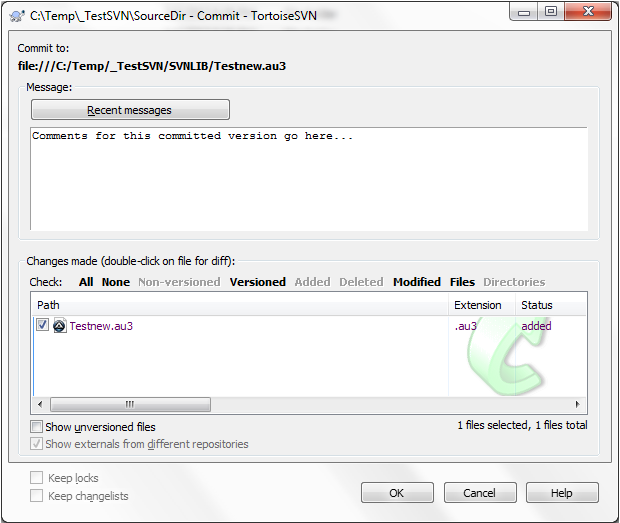

    3. When the “Repository created” dialog appears, click: Create folder structure:

Steps to create the SVN controlled directory for your source files:

    1. Create a new directory or select an empty existing Folder, Rightclick the folder and select: SVN Checkout ...
      Select the matching repository folder and click:
      OK

You are now ready to copy sourcefiles into the Source directory or create your programsources in it.

Manually adding and committing sourcefiles.

  1. Rightclick the files, or the entire folder, and select TortoiseSVN\Add to start the versioning for the file(s).
  2. To commit your changes to the SVN repository you RightMouseClick on the file and select: SVN Commit ...  and click OK


Using SciTE4AutoIt3 menus/keyboard shortcuts and AutoIt3Wrapper directives for adding, committing, and seeing the differences between source versions.


Notes:
SciTE4AutoIt3 Menu items and Keyboard shortcuts:


AutoIt3Wrapper Directives:

Adding these directives to your script and then compiling will prompt you to increase the version number and to add comments before committing the source file to the repository:

Tutorials for those using Versioning for the first time.

The Visual Guide To Version Control explains the basics of versioning, while this e-book offers an in-depth look at how the SVN engine actually works.

.