Search the Community
Showing results for tags 'image capture'.
Found 3 results
-
I have developed a script to find multiple or all occurrence of an image from desktop using the ImageSearch UDF. Please note that the resulting array has the starting position of the images, not middle. #include-once #include <Array.Au3> #RequireAdmin #AutoIt3Wrapper_UseX64=Y Global $y = 0, $x = 0 ;Result x and y coordinates Dim $aResult[1] ;Resulting array Global $sImagePath = @ScriptDir &"\Rect.bmp" Global $nImageWidth = 0 ;Image width Global $nImageHeight = 0 ;Image Height _ImageSearchMultiple() Func _ImageSearchMultiple() Local $search = _ImageSearch($sImagePath, 0, $x, $y, 10) If $search = 1 Then _ArrayDisplay($aResult) Else Msgbox(0,"Not Found","Image Not Found") EndIf EndFunc ; ------------------------------------------------------------------------------ ; ; AutoIt Version: 3.0 ; Language: English ; Description: Functions that assist with Image Search ; Require that the ImageSearchDLL.dll be loadable ; ; ------------------------------------------------------------------------------ ;=============================================================================== ; ; Description: Find the position of an image on the desktop ; Syntax: _ImageSearchArea, _ImageSearch ; Parameter(s): ; $findImage - the image to locate on the desktop ; $tolerance - 0 for no tolerance (0-255). Needed when colors of ; image differ from desktop. e.g GIF ; $resultPosition - Set where the returned x,y location of the image is. ; 1 for centre of image, 0 for top left of image ; $x $y - Return the x and y location of the image ; ; Return Value(s): On Success - Returns 1 ; On Failure - Returns 0 ; ; Note: Use _ImageSearch to search the entire desktop, _ImageSearchArea to specify ; a desktop region to search ; ;=============================================================================== Func _ImageSearch($findImage,$resultPosition, ByRef $x, ByRef $y,$tolerance, $HBMP=0) $nStartX = 0 $nStartY = 0 $nMaxX = @DesktopWidth $nMaxY = @DesktopHeight $nEndX = $nMaxX $nEndY = $nMaxY $nCount = 0 $aResult[0] = $nCount ; Count $nImageWidth = 0 $nImageHeight = 0 While (1) $nResult = _ImageSearchArea($findImage,$resultPosition,$nStartx,$nStarty,$nEndX,$nEndY,$x,$y,$tolerance,$HBMP) If $nResult = 1 Then $nCount = $nCount + 1 $aResult[0] = $nCount Redim $aResult[$nCount + 1 ] $aResult[$nCount] = $x & "," & $y $nStartX = $x + $nImageWidth $nStartY = $y $nEndX = $nMaxX $nEndY = $y + $nImageHeight If $nStartX + $nImageWidth > $nMaxX Or $nStartY + $nImageHeight > $nMaxY Then $nStartX = 0 $nStartY = $y + 1 $nEndX = $nMaxX $nEndY = $nMaxY ContinueLoop EndIf Else If $nEndY >= $nMaxY Then ExitLoop Else $nStartX = 0 $nStartY = $Y + 1 $nEndX = $nMaxX $nEndY = $nMaxY EndIf EndIf wend If $aResult[0] = 0 Then Return 0 Else Return 1 EndIf EndFunc Func _ImageSearchArea($findImage,$resultPosition,$x1,$y1,$right,$bottom, ByRef $x, ByRef $y, $tolerance,$HBMP=0) ;MsgBox(0,"asd","" & $x1 & " " & $y1 & " " & $right & " " & $bottom) if $tolerance>0 then $findImage = "*" & $tolerance & " " & $findImage If IsString($findImage) Then $result = DllCall("ImageSearchDLL.dll","str","ImageSearch","int",$x1,"int",$y1,"int",$right,"int",$bottom,"str",$findImage,"ptr",$HBMP) Else $result = DllCall("ImageSearchDLL.dll","str","ImageSearch","int",$x1,"int",$y1,"int",$right,"int",$bottom,"ptr",$findImage,"ptr",$HBMP) EndIf If IsArray( $result ) = 0 Then return 0 ; If error exit if $result[0]="0" then return 0 ; Otherwise get the x,y location of the match and the size of the image to ; compute the centre of search $array = StringSplit($result[0],"|") $x=Int(Number($array[2])) $y=Int(Number($array[3])) If $nImageWidth = 0 Then $nImageWidth = Int(Number($array[4])) $nImageHeight = Int(Number($array[5])) EndIf if $resultPosition=1 then $x=$x + Int(Number($array[4])/2) $y=$y + Int(Number($array[5])/2) endif return 1 EndFunc ;=============================================================================== ; ; Description: Wait for a specified number of seconds for an image to appear ; ; Syntax: _WaitForImageSearch, _WaitForImagesSearch ; Parameter(s): ; $waitSecs - seconds to try and find the image ; $findImage - the image to locate on the desktop ; $tolerance - 0 for no tolerance (0-255). Needed when colors of ; image differ from desktop. e.g GIF ; $resultPosition - Set where the returned x,y location of the image is. ; 1 for centre of image, 0 for top left of image ; $x $y - Return the x and y location of the image ; ; Return Value(s): On Success - Returns 1 ; On Failure - Returns 0 ; ; ;=============================================================================== Func _WaitForImageSearch($findImage,$waitSecs,$resultPosition, ByRef $x, ByRef $y,$tolerance,$HBMP=0) $waitSecs = $waitSecs * 1000 $startTime=TimerInit() While TimerDiff($startTime) < $waitSecs sleep(100) $result=_ImageSearch($findImage,$resultPosition,$x, $y,$tolerance,$HBMP) if $result > 0 Then return 1 EndIf WEnd return 0 EndFunc ;=============================================================================== ; ; Description: Wait for a specified number of seconds for any of a set of ; images to appear ; ; Syntax: _WaitForImagesSearch ; Parameter(s): ; $waitSecs - seconds to try and find the image ; $findImage - the ARRAY of images to locate on the desktop ; - ARRAY[0] is set to the number of images to loop through ; ARRAY[1] is the first image ; $tolerance - 0 for no tolerance (0-255). Needed when colors of ; image differ from desktop. e.g GIF ; $resultPosition - Set where the returned x,y location of the image is. ; 1 for centre of image, 0 for top left of image ; $x $y - Return the x and y location of the image ; ; Return Value(s): On Success - Returns the index of the successful find ; On Failure - Returns 0 ; ; ;=============================================================================== Func _WaitForImagesSearch($findImage,$waitSecs,$resultPosition, ByRef $x, ByRef $y,$tolerance,$HBMP=0) $waitSecs = $waitSecs * 1000 $startTime=TimerInit() While TimerDiff($startTime) < $waitSecs for $i = 1 to $findImage[0] sleep(100) $result=_ImageSearch($findImage[$i],$resultPosition,$x, $y,$tolerance,$HBMP) if $result > 0 Then return $i EndIf Next WEnd return 0 EndFunc Func _ImageSize($sFileName) Local $aRet[2], $sExt = StringRegExpReplace($sFileName, "^.*\.", "") If (FileExists($sFileName) = 0) Or _ ((StringLen($sExt) = 3) And (StringRegExp($sExt, "(?i)(bmp|gif|jpg|png|tif|emf|wmf)") = 0)) Or _ ((StringLen($sExt) = 4) And (StringRegExp($sExt, "(?i)(tiff|jpeg)") = 0)) Then _ Return SetError(1, 0, $aRet) Local $ghGDIPDll = DllOpen("GDIPlus.dll") Local $tInput = DllStructCreate("int Version;ptr Callback;int NoThread;int NoCodecs") Local $tToken = DllStructCreate("ulong_ptr Data") DllStructSetData($tInput, "Version", 1) DllCall($ghGDIPDll, "int", "GdiplusStartup", "ptr", DllStructGetPtr($tToken), "ptr", DllStructGetPtr($tInput), "ptr", 0) Local $aImage = DllCall($ghGDIPDll, "int", "GdipLoadImageFromFile", "wstr", $sFileName, "ptr*", 0) Local $aResult = DllCall($ghGDIPDll, "int", "GdipGetImageWidth", "handle", $aImage[2], "uint*", -1) $aRet[0] = $aResult[2] $aResult = DllCall($ghGDIPDll, "int", "GdipGetImageHeight", "handle", $aImage[2], "uint*", 0) $aRet[1] = $aResult[2] DllCall($ghGDIPDll, "int", "GdipDisposeImage", "handle", $aImage[2]) DllCall($ghGDIPDll, "none", "GdiplusShutdown", "ptr", DllStructGetData($tToken, "Data")) DllClose($ghGDIPDll) Return SetError(0, 0, $aRet) EndFunc ;==>_ImageSize I'm also attaching the code to capture the image , written by Melba23. #include <GuiConstantsEx.au3> #include <WindowsConstants.au3> #Include <ScreenCapture.au3> #Include <Misc.au3> #include <WinAPISysWin.au3> #include <File.au3> #include <GuiConstantsEx.au3> #include <WindowsConstants.au3> #Include <ScreenCapture.au3> #Include <Misc.au3> #include <WinAPISysWin.au3> Global $iX1, $iY1, $iX2, $iY2, $aPos, $sMsg, $sBMP_Path Mark_Rect() Func Mark_Rect() Local $aMouse_Pos, $hMask, $hMaster_Mask, $iTemp Local $UserDLL = DllOpen("user32.dll") ; Create transparent GUI with Cross cursor $hCross_GUI = GUICreate("Test", @DesktopWidth, @DesktopHeight - 20, 0, 0, $WS_POPUP, $WS_EX_TOPMOST) WinSetTrans($hCross_GUI, "", 8) GUISetState(@SW_SHOW, $hCross_GUI) GUISetCursor(3, 1, $hCross_GUI) Global $hRectangle_GUI = GUICreate("", @DesktopWidth, @DesktopHeight, 0, 0, $WS_POPUP, $WS_EX_TOOLWINDOW + $WS_EX_TOPMOST) GUISetBkColor(0x000000) ; Wait until mouse button pressed While Not _IsPressed("01", $UserDLL) Sleep(10) WEnd ; Get first mouse position $aMouse_Pos = MouseGetPos() $iX1 = $aMouse_Pos[0] $iY1 = $aMouse_Pos[1] ; Draw rectangle while mouse button pressed While _IsPressed("01", $UserDLL) $aMouse_Pos = MouseGetPos() $hMaster_Mask = _WinAPI_CreateRectRgn(0, 0, 0, 0) $hMask = _WinAPI_CreateRectRgn($iX1, $aMouse_Pos[1], $aMouse_Pos[0], $aMouse_Pos[1] + 1) ; Bottom of rectangle _WinAPI_CombineRgn($hMaster_Mask, $hMask, $hMaster_Mask, 2) _WinAPI_DeleteObject($hMask) $hMask = _WinAPI_CreateRectRgn($iX1, $iY1, $iX1 + 1, $aMouse_Pos[1]) ; Left of rectangle _WinAPI_CombineRgn($hMaster_Mask, $hMask, $hMaster_Mask, 2) _WinAPI_DeleteObject($hMask) $hMask = _WinAPI_CreateRectRgn($iX1 + 1, $iY1 + 1, $aMouse_Pos[0], $iY1) ; Top of rectangle _WinAPI_CombineRgn($hMaster_Mask, $hMask, $hMaster_Mask, 2) _WinAPI_DeleteObject($hMask) $hMask = _WinAPI_CreateRectRgn($aMouse_Pos[0], $iY1, $aMouse_Pos[0] + 1, $aMouse_Pos[1]) ; Right of rectangle _WinAPI_CombineRgn($hMaster_Mask, $hMask, $hMaster_Mask, 2) _WinAPI_DeleteObject($hMask) ; Set overall region _WinAPI_SetWindowRgn($hRectangle_GUI, $hMaster_Mask) If WinGetState($hRectangle_GUI) < 15 Then GUISetState() Sleep(10) WEnd ; Get second mouse position $iX2 = $aMouse_Pos[0] $iY2 = $aMouse_Pos[1] ; Set in correct order if required If $iX2 < $iX1 Then $iTemp = $iX1 $iX1 = $iX2 $iX2 = $iTemp EndIf If $iY2 < $iY1 Then $iTemp = $iY1 $iY1 = $iY2 $iY2 = $iTemp EndIf GUIDelete($hRectangle_GUI) GUIDelete($hCross_GUI) DllClose($UserDLL) $sBMP_Path = @ScriptDir & "\Rect.bmp" _ScreenCapture_Capture($sBMP_Path, $iX1, $iY1, $iX2, $iY2, False) EndFunc ;==>Mark_Rect Please see the following links to see the original posts on the ImageSearch UDF and the usage. I hope it will help someone here.
-
 I have a situation where I am repeatedly capturing a region of the screen and feeding it into Tesseract OCR. Since the OCR is a relatively slow operation, I would like to create an in memory cache of the ocr results. An ideal hash key for this cache would be a checksum of the captured image. With this I could capture the region, checksum it, and then only if I don't get a cache hit I would write the image out to disk for external OCR. Now I know I can do this by saving the captured image out to disk, and then summing the disk file with _Crypt_HashFile(). But that's still slower than I would like, and it shouldn't be necessary. Ideally, it should be possible to checksum the image data directly in memory so I don't have to go to disk at all. In order to do that, I need a way to dump a representation of the image into a string (or some equivalent). Then I could use the _Crypt_HashData() function against that string to create my cache hash key. Googling around I found an article here that shows a way to convert an image object to a byte array using System.Drawing. This was the closest thing I found to what I'm trying to do. I don't know if that method could be used from within AutoIT, or if perhaps there may be a better way I don't know about. If someone could give me a shove in the right direction it would be a big help. Thanks!
 -
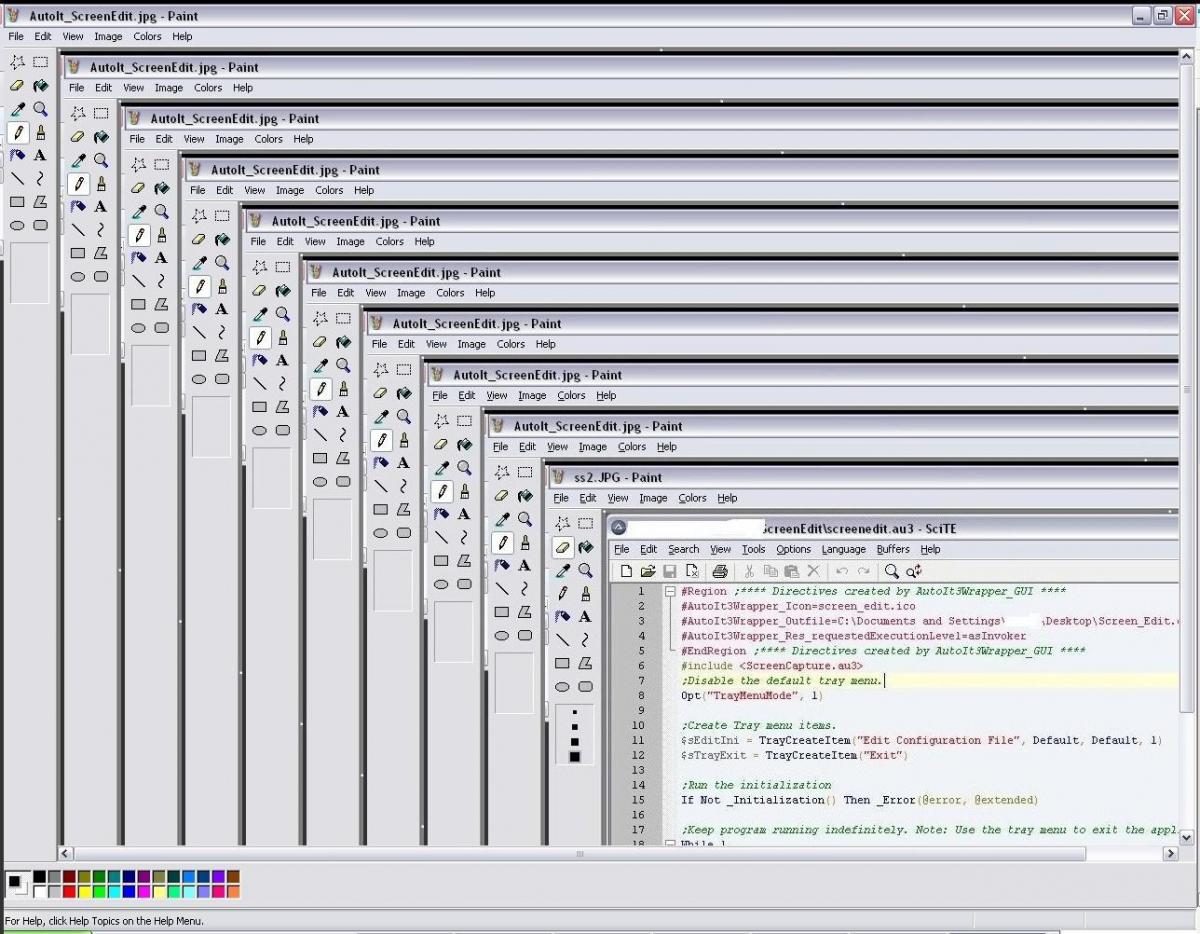
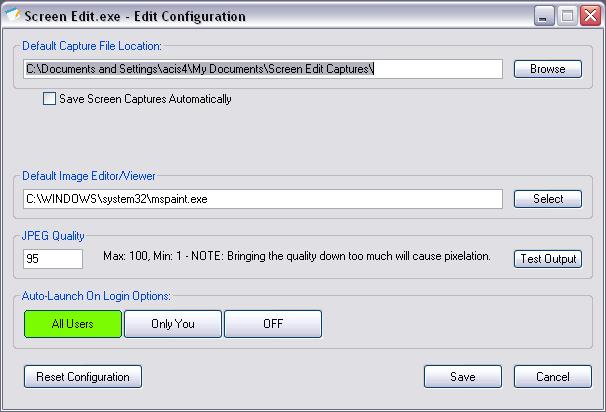
Updated: 7/30/12 OLD CONTENT BELOW Intro: When working on multiple projects and building documentation, taking screenshots, editing them, and then inserting them into files eats up some time. This little program helps to reduce some of that time by auto-opening your screen capture in the editor of your choice while having the ability to auto-save the captures in a sequenced file naming pattern. Installation: Run the Screen Edit vx.x.exe installer. You are given a few different options for installation including setting up the shortcuts and the auto-start on login.After the installation is complete, you can either have it start right away, or manually start it via the program menu or shortcuts if applicable. Comes packed with an uninstaller. Instructions: Use your 'Print Screen' button to capture anything on your desktop. If a specific window has focus (you're actively using it), it will capture that window. If no window has focus, it will capture all of your desktops. To do this, just left-click in some empty space on your desktop and it will remove focus from all windows. This also works on multi-monitor setups. Alternatively, you can use 'ALT + Print Screen' to capture your entire default desktop (from your Default monitor).Upon performing either action, your captured image will automatically open in your editor (by default, this will be Microsoft Paint).If you have the save feature enabled in the configuration, a numbered file will be created. Every subsequent capture will create a new file in sequential order. You can also change the naming scheme of the files in the configuration as well. This is great when you're working on documentation for multiple projects and need a sequence of screenshots. To access the configuration, click on the tray icon for Screen Edit.exe and click 'Edit Configuration File'. The configuration settings include: Changing the default capture file location Auto-Save screen captures Changing the file name scheme Changing your default editor/viewer Changing the JPEG quality of the captured image Testing the output of the captured image with the current configuration Changing the Auto-Launch options To exit the application, click on the tray menu for Screen Edit.exe and click 'Exit'. Changes in version 1.1 Download Links: