Search the Community
Showing results for tags 'crop'.
Found 8 results
-
2020/08/16 New Version CropTool.au3 I've made some changes and fixes to this function: I added the possibility to vary both the thickness of the selector and its color. to customize the appearance and behavior of the tool, you can change the values of some variables in the function listing. See comments on lines 140-170 You can also vary the look of the border by setting a custom dash/space length pattern. Thanks to @UEZ for that. See here for reference. Hope it is free of bugs. (i don't know how to test it to see if it is also DPI aware??) Suggestions for improvements and bug reports are welcome. How to use this demo of use: hit Ctrl+PrintScreen to activate the tool LeftClick and drag on the borders of the tool to resize the area you can also Leftclick and drag within the area to move it around RightClick within the area to shot a screenshot of only the delimited area to the clipboard. in short "how to use the function" outside this demo in your programs: including the following 4 standard udf #include <Windowsconstants.au3> #include <WinAPISys.au3> #include <Misc.au3> #include <GDIPlus.au3> and pasting the _Crop function in your listing is all what you need, then: call the _Crop() function; the 'selector' appears around the mouse hovering the mouse over any side or corner the cursor should change accordingly; LeftClick on the edges and drag to redim the area, also LeftClick within the area and drag to move the selection around. When you are done with the selection, RightClick within the area or also hit the ESC key, the 4 element 1D array is returned to the caller and the 'selector' disappears from the screen Thank you ... below original post ... A function that allows you to freely and visually select an area of the screen Yes I know, there are already some in the forum, however here is yet another cropping tool. I collected some snippets from the forum and merged in a simple and quick cropping tool implemented as a single standalone function. The _Crop() function simply returns a 4-element 1D array with the x-y coordinates of the upper left and the width and height of the selected area, respectively in the elements [0] [1] [2] [3]. So it's up to you to make good use of these parameters An example of use: Since Windows already has both a screenprint functionkey to copy the whole screen to the clipboard and the Alt-printscreen shortkut to copy only the active window to the clipboard, I'm goinmg to bind this _crop() function combined with the Control-printscreen hotkey to create a "partial" screenshot of the delimited area of the screen. The captured screenshot of that area is copied to the clipboard, so you can paste it wherever you want. How to use it: after running the script, use the Control+Printscreen keys to activate the crop tool that appears around the mouse position; then use the mouse to visually resize and move the area and when you have delimited the desired area click with the right mouse button inside the area to copy it to the clipboard. Suggestions, improvements and finally error reports are welcome Happy cropping #AutoIt3Wrapper_Res_HiDpi=y #include <Windowsconstants.au3> #include <WinAPISys.au3> #include <Misc.au3> #include <GDIPlus.au3> #include <Clipboard.au3> ; ---------------------- ; -- Demo start -------- ; ---------------------- #include <ScreenCapture.au3> ; needed only For this demo Global $user32 = DllOpen("user32.dll") While 1 ; hit Control+Printscreen to call the _Crop Function If _IsPressed("11", $user32) And _IsPressed("2C", $user32) Then _example() ; 11 CTRL key + 2C PRINTSCREEN key ; hit Control + c to exit this script (can be castomized with other keys) If _IsPressed("11", $user32) And _IsPressed("43", $user32) Then ExitLoop ; 11 CTRL key + 43 C key Sleep(150) WEnd DllClose($user32) TrayTip("Crop demo", "End of the 'TSR' crop demo", 3, 1) ; (1) = Info icon Sleep(3000) Exit Func _example() $aRect = _Crop() ; mark the area If Not @extended Then ; if the ESC key was pressed within the _Crop function the @extended is set to 1 _GDIPlus_Startup() Local $hGui = GUICreate("", $aRect[2], $aRect[3], $aRect[0] - 1, $aRect[1] - 1, $WS_POPUPWINDOW) Local $idPic = GUICtrlCreatePic('', 0, 0, $aRect[2], $aRect[3]) Local $hTimer = TimerInit() Local $hBmp = _ScreenCapture_Capture('', $aRect[0], $aRect[1], $aRect[0] + $aRect[2] - 1, $aRect[1] + $aRect[3] - 1, False) Local $hBitmap = _GDIPlus_BitmapCreateFromHBITMAP($hBmp) Local $iMidX = $aRect[0] + $aRect[2] / 2 Local $iMidY = $aRect[1] + $aRect[3] / 2 ; snippet by UEZ ; https://www.autoitscript.com/forum/topic/129333-screen-capture-to-clipboard/?do=findComment&comment=898287 Local $bResult = _ClipBoard_Open(0) + _ClipBoard_Empty() + Not _ClipBoard_SetDataEx($hBmp, $CF_BITMAP) _ClipBoard_Close() If $bResult = 2 Then ToolTip("the area was copied to the clipboard", $iMidX, $iMidY, 'Info', 1, 6) Else ToolTip("Something went wrong", $iMidX, $iMidY, 'Error', 3, 6) EndIf ; snippet by Malkey ; https://www.autoitscript.com/forum/topic/191425-capturing-image-without-saving/?do=findComment&comment=1373088 Local $STM_SETIMAGE = 0x0172 GUICtrlSendMsg($idPic, $STM_SETIMAGE, $IMAGE_BITMAP, $hBmp) _WinAPI_DeleteObject($hBmp) GUISetState() DllCall("User32.dll", "int", "AnimateWindow", "hwnd", $hGui, "int", 750, "long", "0x00050002") ; Right-Left GUIDelete($hGui) Sleep(250) ToolTip('') ; #ce ; GUIDelete($hGui) _WinAPI_DeleteObject($hBmp) _GDIPlus_BitmapDispose($hBitmap) _GDIPlus_Shutdown() EndIf EndFunc ;==>_example ; ---------------------- ; -- Demo end ---------- ; ---------------------- ; #FUNCTION# ==================================================================================================================== ; Name ..........: _Crop ; Description ...: A function that allows you to freely and visually select an area of the screen ; Syntax ........: _Crop([$i_X = Default[, $i_Y = Default[, $i_W = Default[, $i_H = Default[, $iMinW = -1[, $iMaxW = -1[, ; $iMinH = -1[, $iMaxH = -1]]]]]]]]) ; ; - To resize the area click the left mouse button and drag on any of the moving colored edges of the tool. ; You can also LeftClick within the selected area and drag to move the whole selection. ; ; - To terminate the selection operation RightClick within the selected area. ; ; You can alse terminate the selection operation by hitting the ESC key; ; in that case the @extended macro will be setted to true ; ; Parameters ....: All parameters are optional: ; $i_X - [optional] an integer value. Default is MouseGetPos(0) - 50. ; The upper left X coordinate where you want the cropping tool to appear ; ; $i_Y - [optional] an integer value. Default is MouseGetPos(1) - 50. ; The upper left Y coordinate where you want the cropping tool to appear ; ; $i_W - [optional] an integer value. Default is 100. ; The initial width of the selection area ; ; $i_H - [optional] an integer value. Default is 100. ; The initial height of the selection area ; ; $iMinW - [optional] an integer value. Default is 1 (minimum allowed is 1). ; The minimum selectable width ; ; $iMaxW - [optional] an integer value. Default is -1 (no limit). ; The maximum selectable width ; ; $iMinH - [optional] an integer value. Default is 1 (minimum allowed is 1). ; The minimum selectable height ; ; $iMaxH - [optional] an integer value. Default is -1 (no limit). ; The maximum selectable height ; ; Return values .: - A 4 element 1D array where: ; element [0] the upperLeft X coordinate of the selected area ; element [1] the upperLeft Y coordinate of the selected area ; element [2] the width of the selected area ; element [3] the height of the selected area ; ; @extended is set to True if you exit from the _crop() function by pressing the ESC key ; ; Author ........: Chimp (Gianni Addiego) ; Modified ......: ; Remarks .......: ; Related .......: ; Link ..........: ; Example .......: ; =============================================================================================================================== ; Func _Crop($i_X = MouseGetPos(0) - 50, $i_Y = MouseGetPos(1) - 50, $i_W = 100, $i_H = 100, $iMinW = -1, $iMaxW = -1, $iMinH = -1, $iMaxH = -1) Func _Crop($i_X = Default, $i_Y = Default, $i_W = Default, $i_H = Default, $iMinW = 1, $iMaxW = -1, $iMinH = 1, $iMaxH = -1) _GDIPlus_Startup() If ($i_X = '') Or ($i_X = Default) Then $i_X = MouseGetPos(0) - 50 If ($i_Y = '') Or ($i_Y = Default) Then $i_Y = MouseGetPos(1) - 50 If ($i_W = '') Or ($i_W = Default) Then $i_W = 100 If ($i_H = '') Or ($i_H = Default) Then $i_H = 100 If ($iMinW < 1) Or ($iMinW = Default) Then $iMinW = 1 If ($iMaxW < 1) Or ($iMaxW = Default) Then $iMaxW = 65535 If ($iMinH < 1) Or ($iMinH = Default) Then $iMinH = 1 If ($iMaxH < 1) Or ($iMaxH = Default) Then $iMaxH = 65535 ; used local variables Local $hGUI2, $hGUI3, $aWinPos2, $aPrevPos2[4], $aClientSize Local $iX, $iY, $iW, $iH Local Enum $x, $y Local $iOuterTolerance, $iBorder, $iInnerTolerance Local $hGraphic, $hPen, $AlphaKey = 0xFF000000, $RectColor, $RectBgColor Local $hDLL = DllOpen("user32.dll") Local $fOffset, $iDelay, $iTimerID = TimerInit() Local $iCursorID, $iBorderID, $aMousePointer, $iSide, $iTopBot, $iInner, $iRightEdge, $iBottomEdge, $iMouseOffsetX, $iMouseOffsetY Local $bEscape ; ================================================================================== ; Set the appearance and behaviour of the tool ; ================================================================================== $iBorder = 2 ; the width of the colored border (minimum 1) ; since with a very thin border it is difficult to click on it to drag it ; it is possible to set an external courtesy area authorized to click on the border ; even if the mouse is not exactly on it (it can also be set to 0 to disable it) $iOuterTolerance = 4 ; 'courtesy' external area allowed to click on the border ; same as above but for the inside of the edge $iInnerTolerance = 3 ; 'courtesy' internal area allowed to click on the border $RectColor = 0xFFFF0000 ; The color of the colored moving edge $RectBgColor = 0xFFFFFF00 ; The Background color of the colored moving edge $iDelay = 50 ; this value determines the rotation speed of the moving colored border. The lower it is, the faster it is ; here the pattern of the moving edge can be customized ; Thanks to @UEZ for this snippet. See Here for reference: https://www.autoitscript.com/forum/topic/185769-moving-dash-rectangle/?do=findComment&comment=1343856 Local $iCount = 4, $tArray = DllStructCreate("float;float;float;float") DllStructSetData($tArray, 1, 2) ; dash length DllStructSetData($tArray, 2, 4) ; space length DllStructSetData($tArray, 3, 2) ; dash length DllStructSetData($tArray, 4, 4) ; space length ; Important!: also set the below variable as the sum of all the above dash/space values ; ========== Local $iDotsDashesTotLen = 2 + 4 + 2 + 4 ; <--- adapt this variable to the above values ; ================================================================================== ; Create a transparent window where to draw the moving colored edge effect using the $iBorder variable ; X and Y coordinates refers to where will be placed the client crop area (not the draggable outer colored border) $hGUI2 = GUICreate('', $i_W + $iBorder * 2, $i_H + $iBorder * 2, $i_X - $iBorder, $i_Y - $iBorder, $WS_POPUP, BitOR($WS_EX_LAYERED, $WS_EX_TOPMOST)) ; make sure $AlphaKey color is different from both $RectColor and $RectBgColor While ($AlphaKey = $RectColor) Or ($AlphaKey = $RectBgColor) $AlphaKey += 1 WEnd GUISetBkColor($AlphaKey, $hGUI2) _WinAPI_SetLayeredWindowAttributes($hGUI2, $AlphaKey, 0, $LWA_COLORKEY) ; Create a transparent window wider than the main one to allow the custom mouse cursor to be displayed even beyond the colored border (Tolerance) ; also, since this window is not "passthrough", it prevents mouse clicks from passing underneath. $hGUI3 = GUICreate('', $i_W + $iBorder * 2 + $iOuterTolerance * 2, $i_H + $iBorder * 2 + $iOuterTolerance * 2, $i_X - $iBorder - $iOuterTolerance, $i_Y - $iBorder - $iOuterTolerance, $WS_POPUP, BitOR($WS_EX_LAYERED, $WS_EX_TOPMOST)) WinSetTrans($hGUI3, "", 1) WinSetOnTop($hGUI3, "", $WINDOWS_ONTOP) GUISetState(@SW_SHOW, $hGUI2) GUISetState(@SW_SHOW, $hGUI3) $hPen = _GDIPlus_PenCreate($RectColor, $iBorder * 2) ; why * 2 ?? _GDIPlus_PenSetColor($hPen, $RectColor) $hGraphic = _GDIPlus_GraphicsCreateFromHWND($hGUI2) Do $iSide = 0 $iTopBot = 0 $iInner = 0 $bEscape = False $aMousePointer = GUIGetCursorInfo($hGUI2) ; zero based $aWinPos2 = WinGetPos($hGUI2) $aClientSize = WinGetClientSize($hGUI2) ; ----------------------- ; check pointer position ; -------------------------------------------------------------------------------------------------------------------------------------------------------- If _ ; Pointer is on the left border (($aMousePointer[$x] >= -$iOuterTolerance) And ($aMousePointer[$x] < ($iBorder + $iInnerTolerance))) And _ (($aMousePointer[$y] >= -$iOuterTolerance) And ($aMousePointer[$y] < ($aClientSize[1] + $iOuterTolerance))) Then $iSide = 1 If _ ; Pointer is on the right border (($aMousePointer[$x] >= ($aClientSize[0] - $iBorder - $iInnerTolerance)) And ($aMousePointer[$x] < ($aClientSize[0] + $iOuterTolerance))) And _ (($aMousePointer[$y] >= -$iOuterTolerance) And ($aMousePointer[$y] < ($aClientSize[1] + $iOuterTolerance))) Then $iSide = 2 If _ ; Pointer is on the top border (($aMousePointer[$y] >= -$iOuterTolerance) And ($aMousePointer[$y] < ($iBorder + $iInnerTolerance))) And _ (($aMousePointer[$x] >= -$iOuterTolerance) And ($aMousePointer[$x] < ($aClientSize[0] + $iOuterTolerance))) Then $iTopBot = 3 If _ ; Pointer is on the bottom border (($aMousePointer[$y] >= ($aClientSize[1] - $iBorder - $iInnerTolerance)) And ($aMousePointer[$y] < $aClientSize[1] + $iOuterTolerance)) And _ (($aMousePointer[$x] >= -$iOuterTolerance) And ($aMousePointer[$x] < ($aClientSize[0] + $iOuterTolerance))) Then $iTopBot = 6 If _ ; Pointer is within the client area (($aMousePointer[$x] >= ($iBorder + $iInnerTolerance)) And $aMousePointer[$x] < ($aClientSize[0] - $iBorder - $iInnerTolerance)) And _ (($aMousePointer[$y] >= ($iBorder + $iInnerTolerance)) And $aMousePointer[$y] < ($aClientSize[1] - $iBorder - $iInnerTolerance)) Then $iInner = 9 ; -------------------------------------------------------------------------------------------------------------------------------------------------------- $iBorderID = $iSide + $iTopBot + $iInner ; ; SetCursor ; --------- $iCursorID = 0 Switch $iBorderID Case 0 $iCursorID = 2 ; ARROW Case 1, 2 ; 1 left ; 2 right $iCursorID = 13 ; SIZEWE Case 3, 6 ; 3 top ; 6 bottom $iCursorID = 11 ; SIZENS Case 5, 7 ; 5 TopRight ; 7 BottomLeft $iCursorID = 10 ; SIZENESW Case 4, 8 ; 4 TopLeft ; 8 BottomRight $iCursorID = 12 ; SIZENWSE Case 9 ; 9 Inside $iCursorID = 0 ; HAND - or SIZEALL (9) EndSwitch GUISetCursor($iCursorID, 1) ; ------------------------------------------------------- ; If LeftClick on the tool then Drag or redimm selector ; ------------------------------------------------------- If _IsPressed("1", $hDLL) And $iBorderID And (WinActive($hGUI2) Or WinActive($hGUI3)) Then ; Left clicked $aWinPos2 = WinGetPos($hGUI2) Switch $iBorderID Case 0 Case 1 ; Pointer is on the left border $iMouseOffsetX = $aWinPos2[0] - MouseGetPos(0) $iRightEdge = $aWinPos2[0] + WinGetClientSize($hGUI2)[0] Case 2 ; Pointer is on the right border $iMouseOffsetX = $aWinPos2[0] + $aWinPos2[2] - MouseGetPos(0) Case 3 ; Pointer is on the top border $iMouseOffsetY = $aWinPos2[1] - MouseGetPos(1) $iBottomEdge = $aWinPos2[1] + $aWinPos2[3] Case 4 ; Pointer is on the top-left corner $iMouseOffsetY = $aWinPos2[1] - MouseGetPos(1) $iMouseOffsetX = $aWinPos2[0] - MouseGetPos(0) $iRightEdge = $aWinPos2[0] + WinGetClientSize($hGUI2)[0] $iBottomEdge = $aWinPos2[1] + $aWinPos2[3] Case 5 ; Pointer is on the top-right corner $iMouseOffsetX = $aWinPos2[0] + $aWinPos2[2] - MouseGetPos(0) $iMouseOffsetY = $aWinPos2[1] - MouseGetPos(1) $iBottomEdge = $aWinPos2[1] + $aWinPos2[3] Case 6 ; Pointer is on the bottom border $iMouseOffsetY = $aWinPos2[1] + $aWinPos2[3] - MouseGetPos(1) Case 7 ; Pointer is on the bottom-left $iMouseOffsetY = $aWinPos2[1] + $aWinPos2[3] - MouseGetPos(1) $iMouseOffsetX = $aWinPos2[0] - MouseGetPos(0) $iRightEdge = $aWinPos2[0] + WinGetClientSize($hGUI2)[0] Case 8 ; Pointer is on the bottom-right $iMouseOffsetY = $aWinPos2[1] + $aWinPos2[3] - MouseGetPos(1) $iMouseOffsetX = $aWinPos2[0] + $aWinPos2[2] - MouseGetPos(0) Case 9 $iMouseOffsetY = $aWinPos2[1] - MouseGetPos(1) $iMouseOffsetX = $aWinPos2[0] - MouseGetPos(0) EndSwitch Do $iX = Default $iY = Default $iW = Default $iH = Default Switch $iBorderID Case 1 ; Pointer is on the left border $iX = MouseGetPos(0) + $iMouseOffsetX $iW = $iRightEdge - MouseGetPos(0) + -$iMouseOffsetX Case 2 ; Pointer is on the right border $iW = (MouseGetPos(0) - $aWinPos2[0]) + $iMouseOffsetX Case 3 ; Pointer is on the top border $iY = MouseGetPos(1) + $iMouseOffsetY $iH = $iBottomEdge - MouseGetPos(1) + -$iMouseOffsetY Case 4 ; Pointer is on the top-left corner $iX = MouseGetPos(0) + $iMouseOffsetX $iY = MouseGetPos(1) + $iMouseOffsetY $iW = $iRightEdge - MouseGetPos(0) + -$iMouseOffsetX $iH = $iBottomEdge - MouseGetPos(1) + -$iMouseOffsetY Case 5 ; Pointer is on the top-right corner $iY = MouseGetPos(1) + $iMouseOffsetY $iW = (MouseGetPos(0) - $aWinPos2[0]) + $iMouseOffsetX $iH = $iBottomEdge - MouseGetPos(1) + -$iMouseOffsetY Case 6 ; Pointer is on the bottom border $iH = (MouseGetPos(1) - $aWinPos2[1]) + $iMouseOffsetY Case 7 ; Pointer is on the bottom-left corner $iX = MouseGetPos(0) + $iMouseOffsetX $iW = $iRightEdge - MouseGetPos(0) + -$iMouseOffsetX $iH = (MouseGetPos(1) - $aWinPos2[1]) + $iMouseOffsetY Case 8 ; Pointer is on the bottom-right corner $iW = (MouseGetPos(0) - $aWinPos2[0]) + $iMouseOffsetX $iH = (MouseGetPos(1) - $aWinPos2[1]) + $iMouseOffsetY Case 9 ; Pointer is inside the client area $iX = MouseGetPos(0) + $iMouseOffsetX $iY = MouseGetPos(1) + $iMouseOffsetY EndSwitch If $iW > ($iMaxW + $iBorder * 2) Then $iW = $iMaxW + $iBorder * 2 $iX = Default EndIf If $iW < ($iMinW + $iBorder * 2) Then $iW = $iMinW + $iBorder * 2 $iX = Default EndIf If $iH > ($iMaxH + $iBorder * 2) Then $iH = $iMaxH + $iBorder * 2 $iY = Default EndIf If $iH < ($iMinH + $iBorder * 2) Then $iH = $iMinH + $iBorder * 2 $iY = Default EndIf WinMove($hGUI2, '', $iX, $iY, $iW, $iH) GUISetCursor($iCursorID, 1) $aWinPos2 = WinGetPos($hGUI2) $aClientSize = WinGetClientSize($hGUI2) ; If GUI2 moved or resized then redraw the colored border and reposition also GUI3 If $aPrevPos2[0] <> $aWinPos2[0] Or $aPrevPos2[1] <> $aWinPos2[1] Or $aPrevPos2[2] <> $aWinPos2[2] Or $aPrevPos2[3] <> $aWinPos2[3] Then ; store new position/size $aPrevPos2[0] = $aWinPos2[0] $aPrevPos2[1] = $aWinPos2[1] $aPrevPos2[2] = $aWinPos2[2] $aPrevPos2[3] = $aWinPos2[3] _GDIPlus_GraphicsDispose($hGraphic) WinMove($hGUI3, '', $aWinPos2[0] - $iOuterTolerance, $aWinPos2[1] - $iOuterTolerance, $aWinPos2[2] + $iOuterTolerance * 2, $aWinPos2[3] + $iOuterTolerance * 2) $hGraphic = _GDIPlus_GraphicsCreateFromHWND($hGUI2) _GDIPlus_GraphicsClear($hGraphic, $AlphaKey) ; erase rect _GDIPlus_PenSetDashStyle($hPen, $GDIP_DASHSTYLESOLID) _GDIPlus_PenSetColor($hPen, $RectBgColor) _GDIPlus_GraphicsDrawRect($hGraphic, 0, 0, $aWinPos2[2], $aWinPos2[3], $hPen) ; _GDIPlus_PenSetDashStyle($hPen, $GDIP_DASHSTYLEDOT) DllCall($__g_hGDIPDll, "int", "GdipSetPenDashArray", "handle", $hPen, "struct*", $tArray, "long", $iCount) _GDIPlus_PenSetColor($hPen, $RectColor) _GDIPlus_GraphicsDrawRect($hGraphic, 0, 0, $aWinPos2[2], $aWinPos2[3], $hPen) ; draw again rect EndIf If TimerDiff($iTimerID) > $iDelay Then $fOffset = Mod($fOffset + .5, $iDotsDashesTotLen) ; this is the key for the animated dotted line ;-) by UEZ ; https://www.autoitscript.com/forum/topic/185769-moving-dash-rectangle/?do=findComment&comment=1343851 DllCall($__g_hGDIPDll, "int", "GdipSetPenDashOffset", "handle", $hPen, "float", $fOffset) _GDIPlus_GraphicsClear($hGraphic, $AlphaKey) ; erase rect _GDIPlus_PenSetDashStyle($hPen, $GDIP_DASHSTYLESOLID) _GDIPlus_PenSetColor($hPen, $RectBgColor) _GDIPlus_GraphicsDrawRect($hGraphic, 0, 0, $aWinPos2[2], $aWinPos2[3], $hPen) ; _GDIPlus_PenSetDashStyle($hPen, $GDIP_DASHSTYLEDOT) DllCall($__g_hGDIPDll, "int", "GdipSetPenDashArray", "handle", $hPen, "struct*", $tArray, "long", $iCount) _GDIPlus_PenSetColor($hPen, $RectColor) _GDIPlus_GraphicsDrawRect($hGraphic, 0, 0, $aWinPos2[2], $aWinPos2[3], $hPen) ; draw again rect $iTimerID = TimerInit() EndIf Until Not _IsPressed("1", $hDLL) ; Right click released EndIf If TimerDiff($iTimerID) > $iDelay Then $fOffset = Mod($fOffset + .5, $iDotsDashesTotLen) DllCall($__g_hGDIPDll, "int", "GdipSetPenDashOffset", "handle", $hPen, "float", $fOffset) ; this is the key for the animated dotted line ;-) by UEZ _GDIPlus_GraphicsClear($hGraphic, $AlphaKey) ; erase rect _GDIPlus_PenSetDashStyle($hPen, $GDIP_DASHSTYLESOLID) _GDIPlus_PenSetColor($hPen, $RectBgColor) _GDIPlus_GraphicsDrawRect($hGraphic, 0, 0, $aWinPos2[2], $aWinPos2[3], $hPen) ; _GDIPlus_PenSetDashStyle($hPen, $GDIP_DASHSTYLEDOT) DllCall($__g_hGDIPDll, "int", "GdipSetPenDashArray", "handle", $hPen, "struct*", $tArray, "long", $iCount) _GDIPlus_PenSetColor($hPen, $RectColor) _GDIPlus_GraphicsDrawRect($hGraphic, 0, 0, $aWinPos2[2], $aWinPos2[3], $hPen) ; draw again rect $iTimerID = TimerInit() EndIf If _IsPressed('1B', $hDLL) Then $bEscape = True ; 1B ESC key Until ((_IsPressed('2', $hDLL) Or $bEscape) And (WinActive($hGUI2) Or WinActive($hGUI3))) ; RightClick means I'm done with selection Do ; neutralize the RightClick persistency Until Not _IsPressed('2', $hDLL) Local $aGotRect[4] = [ _ $aWinPos2[0] + $iBorder, _ ; ....... UpperLeft X of window's client area $aWinPos2[1] + $iBorder, _ ; ....... UpperLeft Y of window's client area $aWinPos2[2] - $iBorder * 2, _ ; ... Width of window's client area $aWinPos2[3] - $iBorder * 2 _ ; .... Height of window's client area ] _GDIPlus_PenDispose($hPen) _GDIPlus_GraphicsDispose($hGraphic) _GDIPlus_Shutdown() DllClose($hDLL) $tArray = 0 GUIDelete($hGUI3) GUIDelete($hGUI2) Return SetError(0, $bEscape, $aGotRect) EndFunc ;==>_Crop CropTool.au3
- 22 replies
-
- 4
-

-

-
- area selector
- crop
- (and 1 more)
-
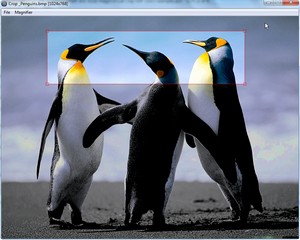
This is a visual Crop Tool, Version 1.0.0.5 Load the image in the Crop GUIMove the cross-hair to the upper left corner where to start croppingMark the rectangle with left mouse button, releaseAdjust the position with left mouse, release (right mouse = start over)Press enterImage is saved in same folder, same format, with '_cr' added to file nameAs simple as that. Updated script, Visual Crop UDF 1.0.0.4 examples.au3 Visual Crop UDF 1.0.0.4.au3 (No obscuration of non-selected area) Visual Crop UDF 1.0.0.5.au3 (with obscuration) Ver 1.0.0.1 Avoid trespassing the edge of the GUI while selecting the crop area.Ver 1.0.0.4 Mark crop area in any directionResizing Corner grabbers (use with Ctrl Left Mouse button)Mouse cursor changes over move and resizing corner grabbersRedraw when left mouse clicking outside of crop area (restart crop), right Mouse click, same result.Magnifier de-/selectable with Ctrl-M or F2. (original function by Melba23) Note: without image ratio: Magnifier remains visible till the crop area has been marked with image ratio: Magnifier is only visible until the rectangle appears, first corner has been marked. Ver 1.0.0.5 Obscure non crop area, did some hard thinking and found my way... Missing still: ?Enjoy GreenCan Related:

-
UEZ has kindly provided me with code that rotates an image per a line: see here Because I want to trim a photograph after rotation, I need to crop the photo. I wrote code which calls _GDIPlus_GraphicsSetClipRect() to do this, but it places spurious stuff in the corners: see 2.jpg attached. I want only the trimmed photo to show. The original jpeg is also attached. The arguments to _GDIPlus_GraphicsSetClipRect() come from solving 2 simultaneous equations: if a and b are the width and height of the original photo, find x and y, the width and height of the rotated and cropped rectangle; a = x cos(ang) + y sin(ang) b = x sin(ang) + y cos(ang) My solution is: x = (b * sin(ang) - a*cos(ang)) / (sin(ang)^2 - (cos(ang)^2) y = (b * cos(ang) - a * sin(ang)) / (cos(ang)^2 - sin(ang)^2) To try to get a handle on the problem, I have temporarily added in several lines in Case $btn. In 2.jpg, you can see that the rectangle bounding the area to be retained is in the wrong place. The code is: #include <ButtonConstants.au3> #include <GDIPlus.au3> #include <GUIConstantsEx.au3> #include <StaticConstants.au3> #include <WindowsConstants.au3> Opt('MustDeclareVars',1) Global Const $MK_SHIFT = 0x4 Global Const $MK_CONTROL = 0x8 Global Const $fPi = ACos(-1), $fPi2 = $fPi / 2, $fRad = 180 / $fPi GUIRegisterMsg($WM_MOUSEWHEEL, "WM_MOUSEWHEEL") GUIRegisterMsg($WM_PAINT,'WM_PAINT') Global $gX0=10,$gX1=580,$gY0,$gY1,$gForm1,$glblPic,$iLW,$iLH,$iW,$iH Global $ghCanvas,$ghImage,$ghPen,$gGraphicPic,$ghBitmap,$ghMatrix,$ghImageClone,$ghGfxClone Global Const $kDegToRads = 3.14159/180 main() Func main() $gForm1 = GUICreate("Form1", 623, 601, 192, 114) $iLW = 589 $iLH = 500 $glblPic = GUICtrlCreateLabel("", 8, 8, $iLW, $iLH) Local $btn = GUICtrlCreateButton("Rotate", 472, 560, 65, 25) GUISetState(@SW_SHOW) Local $oldY0,$oldY1,$fAngle _GDIPlus_Startup() $ghPen = _GDIPlus_PenCreate(0xFF999999,2) $ghImage = _GDIPlus_ImageLoadFromFile('H:\b\pergola.jpg') Local $h = GUICtrlGetHandle($glblPic) $gGraphicPic = _GDIPlus_GraphicsCreateFromHWND($h) $gY0 = 400 $gY1 = 400 $iW = _GDIPlus_ImageGetWidth($ghImage) $iH = _GDIPlus_ImageGetHeight($ghImage) $ghBitmap = _GDIPlus_BitmapCreateFromScan0($iW, $iH) $ghCanvas = _GDIPlus_ImageGetGraphicsContext($ghBitmap) $ghMatrix = _GDIPlus_MatrixCreate() ; Loop until the user exits. While True If $gY0<>$oldY0 Or $gY1<>$oldY1 Then Paint() $oldY0 = $gY0 $oldY1 = $gY1 Else Switch GUIGetMsg() Case $GUI_EVENT_CLOSE ExitLoop Case $btn $ghImageClone=_GDIPlus_BitmapCreateFromScan0($iW, $iH) $ghGfxClone=_GDIPlus_ImageGetGraphicsContext($ghImageClone) _GDIPlus_MatrixTranslate($ghMatrix, $iW/2, $iH/2) $gY1 = 300 ; temp Local $ang = -Angle($gY1-$gY0, $gX1-$gX0) _GDIPlus_MatrixRotate($ghMatrix, $ang) ;~ _GDIPlus_MatrixRotate($ghMatrix, -Angle($gY1-$gY0, $gX1-$gX0)) _GDIPlus_MatrixTranslate($ghMatrix, -$iW/2, -$iH/2) _GDIPlus_GraphicsSetTransform($ghGfxClone, $ghMatrix) _GDIPlus_GraphicsDrawImageRect($ghGfxClone,$ghImage,0,0,$iW,$iH) Local $angRads = $ang*$kDegToRads Local $sinAng = Sin($angRads) Local $cosAng = Cos($angRads) Local $wid = ($iLH*$sinAng-$iLW*$cosAng)/($sinAng^2-$cosAng^2) Local $left = ($iLW-$wid)/2 Local $ht = ($iLH*$cosAng-$iLW*$sinAng)/($cosAng^2-$sinAng^2) Local $top = ($iLH-$ht)/2 _GDIPlus_GraphicsDrawRect($ghGfxClone,$left,$top,$wid,$ht,$ghPen) ; temp _GDIPlus_GraphicsSetClipRect($ghGfxClone,$left,$top,$wid,$ht,0) _GDIPlus_GraphicsDispose($ghGfxClone) $ghGfxClone=_GDIPlus_ImageGetGraphicsContext($ghImage) _GDIPlus_GraphicsClear($ghImage) _GDIPlus_GraphicsDrawImageRect($ghGfxClone,$ghImageClone,0,0,$iW,$iH) _GDIPlus_GraphicsDispose($ghGfxClone) _GDIPlus_ImageDispose($ghImageClone) $gy0 = 400 $gy1 = 400 Paint() _GDIPlus_ImageSaveToFile($ghImage,'H:\b\2.jpg') ; added - is rotated, with same size as original file EndSwitch EndIf WEnd ; Clean up resources _GDIPlus_MatrixDispose($ghMatrix) _GDIPlus_ImageDispose($ghCanvas) _GDIPlus_ImageDispose($ghImage) _GDIPlus_ImageDispose($ghBitmap) _GDIPlus_PenDispose($ghPen) _GDIPlus_GraphicsDispose($gGraphicPic) _GDIPlus_Shutdown() EndFunc Func WM_MOUSEWHEEL($hWnd, $iMsg, $wParam, $lParam) #forceref $hWnd, $iMsg, $wParam, $lParam Local Const $kYmax=$iLH-1,$kDelta=2 Local $vec = GUIGetCursorInfo($gForm1) If $vec[4] = $vec[4]=$glblPic Then Local $iDelta = BitShift($wParam, 16) ; positive = up Local $iKeys = _WinAPI_LoWord($wParam) If BitAND($iKeys,$MK_CONTROL)=$MK_CONTROL Then If BitAND($iKeys,$MK_SHIFT)=$MK_SHIFT Then ; do nothing Else If $iDelta > 0 And $gY0>3 Then $gY0 -= $kDelta If $iDelta < 0 And $gY0<$kYmax Then $gY0 += $kDelta EndIf Else If BitAND($iKeys,$MK_SHIFT)=$MK_SHIFT Then If $iDelta > 0 And $gY1>3 Then $gY1 -= $kDelta If $iDelta < 0 And $gY1<$kYmax Then $gY1 += $kDelta Else If $iDelta > 0 And $gY0>3 Then $gY0 -= $kDelta If $iDelta < 0 And $gY0<$kYmax Then $gY0 += $kDelta If $iDelta > 0 And $gY1>3 Then $gY1 -= $kDelta If $iDelta < 0 And $gY1<$kYmax Then $gY1 += $kDelta EndIf EndIf EndIf Return $GUI_RUNDEFMSG EndFunc ;==>WM_MOUSEWHEEL Func Paint() _GDIPlus_GraphicsClear($ghCanvas,0) _GDIPlus_GraphicsDrawImageRect($ghCanvas, $ghImage, 0,0, $iLW, $iLH) _GDIPlus_GraphicsDrawLine($ghCanvas, $gX0, $gY0, $gX1, $gY1, $ghPen) _GDIPlus_GraphicsDrawImageRect($gGraphicPic, $ghBitmap, 0, 0, $iW, $iH) EndFunc Func WM_PAINT() _WinAPI_RedrawWindow($gForm1, 0, 0, $RDW_UPDATENOW) Paint() _WinAPI_RedrawWindow($gForm1, 0, 0, $RDW_VALIDATE) EndFunc Func Angle($y, $x) ;return value is in degree Local Const $fPi = ACos(-1), $fPi2 = ACos(-1) / 2, $fRad = 180 / $fPi Switch True Case ($x > 0) Return ATan($y / $x) * $fRad Case ($x < 0 And $y >= 0) Return ATan($y / $x + $fPi) * $fRad Case ($x < 0 And $y < 0) Return ATan($y / $x - $fPi) * $fRad Case ($x = 0 And $y > 0) Return $fPi2 * $fRad Case ($x = 0 And $y < 0) Return -$fPi2 * $fRad Case ($x = 0 And $y = 0) Return 0 EndSwitch EndFunc I also don't understand how the rotated picture gets displayed. There are graphics objects, graphics contexts and PDI+ bitmaps. How are they related? Help would be much appreciated.
-
Version 1.0.1.4
1,077 downloads
Easily Crop a picture to a wanted dimension and set your Windows desktop background wallpaper without stretching or distorting it. Drag'n drop a Picture for load it. Drag it for position it and use mouse wheel for zoom - unzoom it.(TouchPad users need to plug a Mouse ) Select dimensions and format you want for save your wallpaper. Pictures with transparency are supported. By default Pictures are saved on your desktop. Tips : Hold Left Ctrl key for move the photo more slowly. Hold Left Shift key for move the photo more quickly. Hold Left Shift key for Zoom/UnZoom more quickly. Hold Left Shift key when drag'n drop photo for work with a best quality. (Moves and Zoom are more slow) Executable : WallpaperCropper.exe -
I have lot's of images like this http://postimg.org/image/uz24d8z27/ http://postimg.org/image/5isx6mc61/ i would like to crop the page number (the arabic number on the top of the page) so it would be something like this ... any ideas ?
-
 WallpaperCropper Easily Crop a picture to a wanted Screen dimension and set your Windows desktop background wallpaper without stretching or distorting it. Does your desktop background picture look stretched ? Do you find it time-consuming to crop pictures to the right proportions for your desktop ? WallpaperCropper is the solution. Crop and set any picture easily to your desktop dimensions in some few clicks. Don't waste time loading big, slow photo-editing software to manually crop it or resize it. Don't stay stuck with the choices Windows gives you ! Drag'n drop a Picture for load it. Drag it for position it and use mouse wheel for zoom - unzoom it.(TouchPad users need to plug a Mouse ) Select dimensions and format you want for save your wallpaper. Pictures with transparency are supported. By default Pictures are saved on your desktop. Tips : Hold Left Ctrl key for move the photo more slowly. Hold Left Shift key for move the photo more quickly. Hold Left Shift key for Zoom/UnZoom more quickly. Hold Left Shift key when drag'n drop photo for work with a best quality. (Moves and Zoom are more slow) All externals files are included in script, and all Buttons were made online with chimply.com the easy and free buttons Generator ! Previous downloads : 70 source : WallpaperCropper 1.0.1.5.au3 executable : WallpaperCropper.exe.html (Once this html file downloaded, double click on it for start the download) Hope you will like it !
 -
This is my attempt on loading and let the user select only a portion of an image. I found some samples by Melba23 and UEZ and tried to glue things together. I think I've almost done it but still have some problems: Resizing and displaying image is not always proportional (just try the script with different resolution images, expecially big ones) The rectangle selection to crop is wrong: it actually selects a different region of the screen Function _GUICtrlStatic_SetImage does not work. Temporarily fixed using _WinAPI_DeleteObject instead...Any hint would be greatly appreciated! #include <GuiConstantsEx.au3> #include <WindowsConstants.au3> #Include <ScreenCapture.au3> #Include <Misc.au3> #include <StaticConstants.au3> Global $iX1, $iY1, $iX2, $iY2, $aPos, $sMsg, $sBMP_Path Global Const $IMAGE_BITMAP = 0 ; Needed for GUICtrlSendMsg. Global Const $STM_SETIMAGE = 0x0172 ; Needed for GUICtrlSendMsg. Local $GUIimg_title,$GUIwidth,$GUIheight,$GUILeft,$GUITop Local $filename = FileOpenDialog("Select image", @ScriptDir, "Image (*.jpg;*.bmp)", 3) $GUIimg_title = $filename _GDIPlus_Startup() Local $imagefromfile = _GDIPlus_ImageLoadFromFile($filename) ;Create an image object based on a file [OK] **NOTA PER LA ROTAZIONE VEDI HELP FILE!** Local $GUIwidth = _GDIPlus_ImageGetWidth ($imagefromfile) Local $GUIheight = _GDIPlus_ImageGetHeight ($imagefromfile) ;try to create a smaller window if the pictures is bigger than Desktop If $GUIwidth > @DesktopWidth Then $GUIwidth = @DesktopWidth - 6 EndIf If $GUIheight > @DesktopHeight Then $GUIheight = @DesktopHeight - 73 ; rought attempt to show the window bar... EndIf $GUILeft = (@DesktopWidth - $GUIwidth) / 2 $GUITop = (@DesktopHeight - $GUIheight) / 2 $hBitmap_resized = _GDIPlus_ScaleImage($imagefromfile, $GUIwidth, $GUIheight); attempts to scale the image but it not always proportional.. _GDIPlus_ImageDispose($imagefromfile) ; Display image $hBitmap_GUI = GUICreate($GUIimg_title & " [" & $GUIwidth & "x" & $GUIheight & "]", $GUIwidth, $GUIheight,$GUILeft,$GUITop) $hPic = GUICtrlCreatePic("", 0, 0, $GUIwidth, $GUIheight) GUISetState() Local $hHBitmap_resized = _GDIPlus_BitmapCreateHBITMAPFromBitmap($hBitmap_resized); creates an handle _WinAPI_DeleteObject(GUICtrlSendMsg($hPic, $STM_SETIMAGE, $IMAGE_BITMAP, $hHBitmap_resized)) ; Updates the GUI - It works instead of _GDIPlus_ImageDispose($hHBitmap_resized) [OK] _WinAPI_DeleteObject($hHBitmap_resized) ;~ _GUICtrlStatic_SetImage($hPic, $hBitmap_resized); does not seems to work... using _WinAPI_DeleteObject above _GDIPlus_Shutdown() ; Create GUI ;~ Local $GUITop = $hMain_GUI = GUICreate("Select a function", 480, 50) $hRect_Button = GUICtrlCreateButton("Crop", 10, 10, 80, 30) $hRot_90_plus_Button = GUICtrlCreateButton("+90°", 95, 10, 50, 30) $hRot_90_minus_Button = GUICtrlCreateButton("-90°", 150, 10, 50, 30) $hOK_Button = GUICtrlCreateButton("OK", 305, 10, 50, 30) $hCancel_Button = GUICtrlCreateButton("Cancel", 360, 10, 80, 30) GUISetState() While 1 Switch GUIGetMsg() Case $GUI_EVENT_CLOSE, $hCancel_Button FileDelete(@ScriptDir & "Rect.bmp") Exit Case $hRect_Button GUISetState(@SW_HIDE, $hMain_GUI) Mark_Rect($GUIwidth,$GUIheight,$GUILeft,$GUITop);selects wrong area!! ; Capture selected area $sBMP_Path = @ScriptDir & "Rect.bmp" ;~ _ScreenCapture_Capture($sBMP_Path, $iX1, $iY1, $iX2, $iY2, False) _ScreenCapture_CaptureWnd($sBMP_Path, $hBitmap_GUI,$iX1, $iY1, $iX2, $iY2, False) GUISetState(@SW_SHOW, $hMain_GUI) GUIDelete($hBitmap_GUI) ; Display image $hBitmap_GUI = GUICreate("Selected Rectangle", $iX2 - $iX1 + 1, $iY2 - $iY1 + 1, 100, 100) $hPic = GUICtrlCreatePic(@ScriptDir & "Rect.bmp", 0, 0, $iX2 - $iX1 + 1, $iY2 - $iY1 + 1) GUISetState() case $hRot_90_plus_Button ; Rotate +90 case $hRot_90_minus_Button ;Rotate -90 case $hOK_Button ;should return the resulting picture object EndSwitch WEnd ; ------------- Func Mark_Rect($width = @DesktopWidth, $height = @DesktopHeight, $Left = 0, $Top = 0);Made by Melba23 - Arguments added by me Local $aMouse_Pos, $hMask, $hMaster_Mask, $iTemp Local $UserDLL = DllOpen("user32.dll") Global $hRectangle_GUI = GUICreate("", $width, $height, $Left, $Top, $WS_POPUP, $WS_EX_TOOLWINDOW + $WS_EX_TOPMOST);create fading _GUICreateInvRect($hRectangle_GUI, 0, 0, 1, 1) GUISetBkColor(0) WinSetTrans($hRectangle_GUI, "", 95) GUISetState(@SW_SHOW, $hRectangle_GUI) GUISetCursor(3, 1, $hRectangle_GUI) ; Wait until mouse button pressed While Not _IsPressed("01", $UserDLL) Sleep(10) WEnd ; Get first mouse position $aMouse_Pos = MouseGetPos() $iX1 = $aMouse_Pos[0] $iY1 = $aMouse_Pos[1] ; Draw rectangle while mouse button pressed While _IsPressed("01", $UserDLL) $aMouse_Pos = MouseGetPos() ; Set in correct order if required If $aMouse_Pos[0] < $iX1 Then $iX_Pos = $aMouse_Pos[0] $iWidth = $iX1 - $aMouse_Pos[0] Else $iX_Pos = $iX1 $iWidth = $aMouse_Pos[0] - $iX1 EndIf If $aMouse_Pos[1] < $iY1 Then $iY_Pos = $aMouse_Pos[1] $iHeight = $iY1 - $aMouse_Pos[1] Else $iY_Pos = $iY1 $iHeight = $aMouse_Pos[1] - $iY1 EndIf _GUICreateInvRect($hRectangle_GUI, $iX_Pos, $iY_Pos, $iWidth, $iHeight) Sleep(10) WEnd ; Get second mouse position $iX2 = $aMouse_Pos[0] $iY2 = $aMouse_Pos[1] ; Set in correct order if required If $iX2 < $iX1 Then $iTemp = $iX1 $iX1 = $iX2 $iX2 = $iTemp EndIf If $iY2 < $iY1 Then $iTemp = $iY1 $iY1 = $iY2 $iY2 = $iTemp EndIf GUIDelete($hRectangle_GUI) DllClose($UserDLL) EndFunc ;==>Mark_Rect Func _GUICreateInvRect($hWnd, $iX, $iY, $iW, $iH) $hMask_1 = _WinAPI_CreateRectRgn(0, 0, @DesktopWidth, $iY) $hMask_2 = _WinAPI_CreateRectRgn(0, 0, $iX, @DesktopHeight) $hMask_3 = _WinAPI_CreateRectRgn($iX + $iW, 0, @DesktopWidth, @DesktopHeight) $hMask_4 = _WinAPI_CreateRectRgn(0, $iY + $iH, @DesktopWidth, @DesktopHeight) _WinAPI_CombineRgn($hMask_1, $hMask_1, $hMask_2, 2) _WinAPI_CombineRgn($hMask_1, $hMask_1, $hMask_3, 2) _WinAPI_CombineRgn($hMask_1, $hMask_1, $hMask_4, 2) _WinAPI_DeleteObject($hMask_2) _WinAPI_DeleteObject($hMask_3) _WinAPI_DeleteObject($hMask_4) _WinAPI_SetWindowRgn($hWnd, $hMask_1, 1) EndFunc Func _GDIPlus_ScaleImage($hImage, $iW, $iH, $iInterpolationMode = 7) ;coded by UEZ 2012 Local $hBitmap = DllCall($ghGDIPDll, "uint", "GdipCreateBitmapFromScan0", "int", $iW, "int", $iH, "int", 0, "int", 0x0026200A, "ptr", 0, "int*", 0) If @error Then Return SetError(3, 0, 0) $hBitmap = $hBitmap[6] Local $hBmpCtxt = _GDIPlus_ImageGetGraphicsContext($hBitmap) DllCall($ghGDIPDll, "uint", "GdipSetInterpolationMode", "handle", $hBmpCtxt, "int", $iInterpolationMode) _GDIPlus_GraphicsDrawImageRect($hBmpCtxt, $hImage, 0, 0, $iW, $iH) _GDIPlus_ImageDispose($hImage) _GDIPlus_GraphicsDispose($hBmpCtxt) Return $hBitmap EndFunc Func _GUICtrlStatic_SetImage($iCtrlId, $hBitmap) Local Const $STM_SETIMAGE = 0x0172 Local Const $IMAGE_BITMAP = 0 Local Const $SS_BITMAP = 0xE Local Const $GWL_STYLE = -16 If IsHWnd($iCtrlId) Then If WinGetProcess($iCtrlId) <> @AutoItPID Then Return SetError(1,0,0) Else $iCtrlId = GUICtrlGetHandle($iCtrlId) If Not $iCtrlId Then Return SetError(2,0,0) EndIf ; set SS_BITMAP style to control Local $oldStyle = DllCall("user32.dll", "long", "GetWindowLong", "hwnd", $iCtrlId, "int", $GWL_STYLE) If @error Then Return SetError(3, 0, 0) DllCall("user32.dll", "long", "SetWindowLong", "hwnd", $iCtrlId, "int", $GWL_STYLE, "long", BitOR($oldStyle[0], $SS_BITMAP)) If @error Then Return SetError(4, 0, 0) Local $oldBmp = DllCall("user32.dll", "handle", "SendMessageW", "hwnd", $iCtrlId, "int", $STM_SETIMAGE, "wparam", $IMAGE_BITMAP, "handle", $hBitmap) If @error Then Return SetError(5, 0, 0) If $oldBmp[0] Then _WinAPI_DeleteObject($oldBmp[0]) Return 1 EndFunc
-
Hi there.. I want to work on a image review tool. The basic idea of this tool is to review some GUI applications (developed in any language) and give comments to the developer with reference to the part of the GUI, I am making comment on. The final report with comments needs to be in MS Excel. My idea is first run the application under review and get the GUI. Then using AutoIT place a transperant layer over it (could be on whole of the desktop size also) then mark a rectangle with a cross mouse icon on interested area, get the image of that area from the GUI beneath the transparent layer. After that get a text box or something where I can put down my comment about the croped area. Finally save those comments and croped images in excel file. My questions are: 1. Is it possible to get a transparent layer over the GUI using Autoit? 2. Where to find some examples to start with? 3. How do I get the marked image from the desktop? Thanks in advance